Camera Calibration
The package kangaroo_camera_calibration calibrates the pose of a torso RGB-D camera (torso_front, waist_front) with a ChArUco board on the left gripper. The result is a corrected <origin> for the camera in kangaroo_description/urdf/torso/torso.urdf.xacro.
Hardware
Print hardware/charuco_board.pdf at 100 % scale (check one 30 mm square with a caliper). Glue it into the 3D-printed charuco_mount.stl and attach the mount to the left gripper. The mount must be screwed on with both screws of the gripper (the image shows only one of the two screwed in, for visualization).
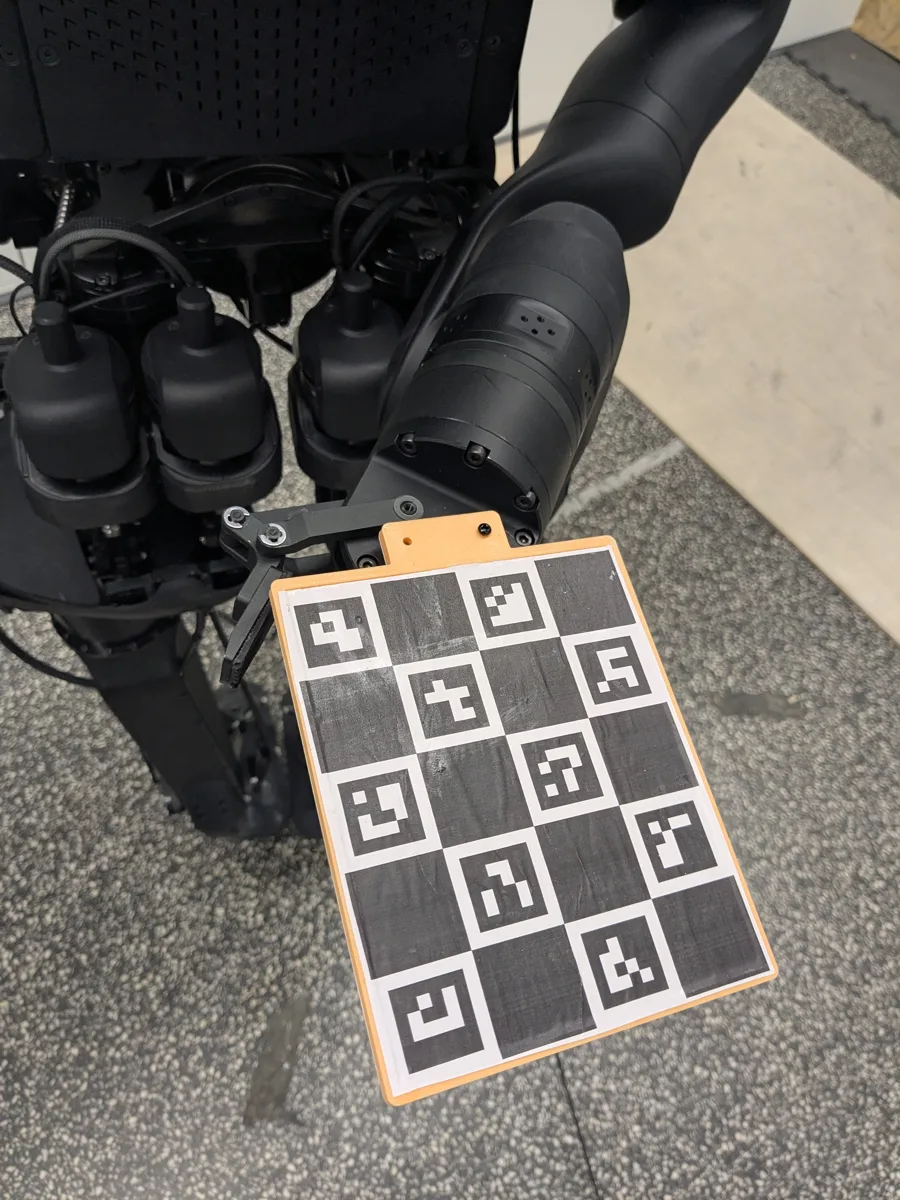
Steps
Before you start, check that the Kangaroo Doctor is green. If an arm motion fails during the steps, look at the doctor first.
-
Teach 6–8 seed poses spread over the workspace (left/right, high/low, near/far):
roslaunch kangaroo_camera_calibration teach.launch camera:=torso_frontIn RViz, right-click the marker: Suggest pose → Move arm to marker → check the detection image → Record current pose.
-
Collect data and solve:
rosrun kangaroo_camera_calibration collect.py --camera torso_front --dry-run # plan only rosrun kangaroo_camera_calibration collect.py --camera torso_front rosrun kangaroo_camera_calibration solve.py data/<camera>_<date>/dataset.yaml -
Put the printed
<origin>into the xacro on the robot and restart the robot bringup (Restart ros_bringup button in the Kangaroo Doctor).
Warning
MoveIt plans the motions with the board attached, but the table is not modelled. Keep the e-stop at hand.
Note
The left arm kinematics are off by approx. 1°, so the result has approx. 4 mm RMS error. See the package README for details.